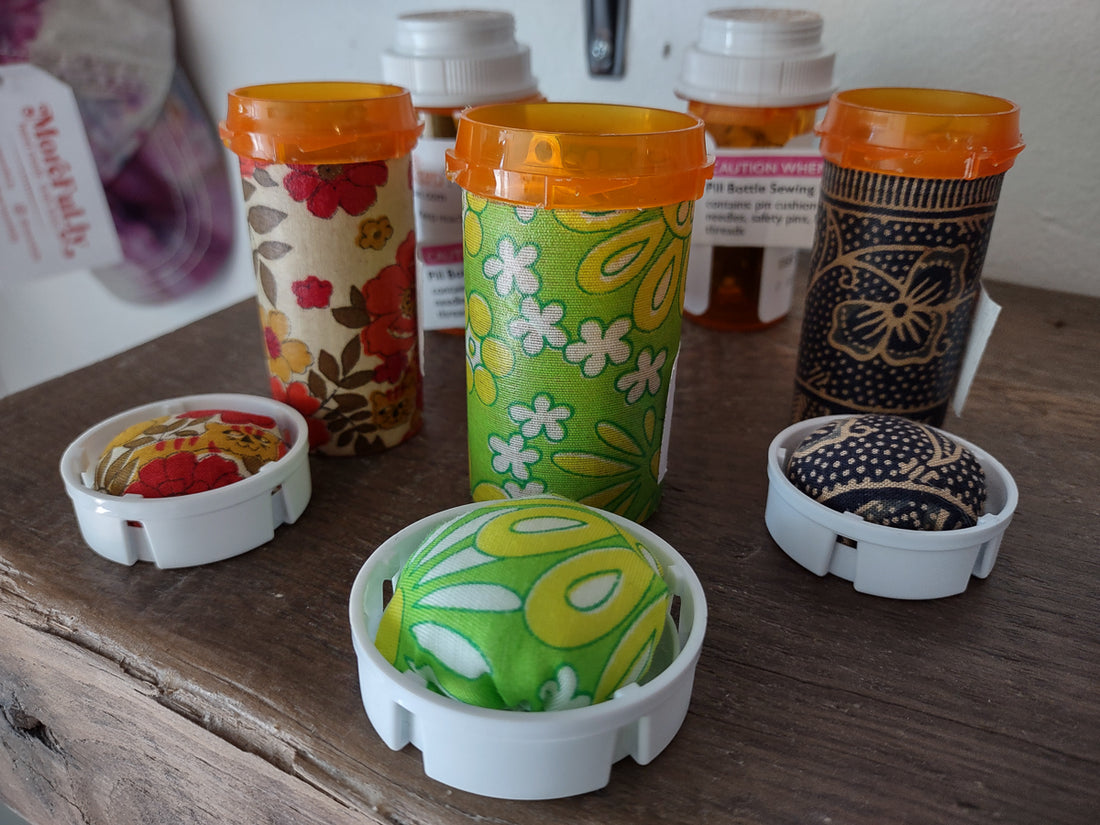
In the middle of March, I gave a workshop to teach how to make clothed pill bottles for mini-sewing kits. I originally made a pill bottle sewing kits with fake prescription labels, but now I am also making clothed ones.
The process is simple.
-
Sand off the pharmacy names or any other prints on the lid. #300 sandpaper works well. If sanding leaves any visible scratches, use finer sandpaper, like #600 to smooth them out.
-
Cut out fabric to circle to make a pin cushion. The size of the circle should be larger enough to make a ball and attach to inside of the lid.
-
Using a needle and thread, make a running stitch about 1/4” inside of the front side perimeter.
-
Make a ball with a cotton, place it at the center of the stitched circle, and tighten the stitches to make gathers. Knot the ends to secure. Cut off the excess thread.
-
Attach the pin cushion to the lid, using a hot glue gun. To avoid burning your fingers, make sure to apply the glue on the lid, not on the pin cushion.
-
Measure the circumference the bottle and the height from the bottom to the ridge, and cut fabric to that size. 1/8” overlap should be enough.
-
Glue the fabric onto the bottle. The glue should be applied on the bottle, and spread it with a brush. I found out that Mod Podge seeps through the fabric and leave stains, but Aleene’s Permanent Fabric Glue works well.
-
When the glue dries, coat it with water based polyurethane for 3 times. The polyurethane coat is for furniture and floor. I use satin, because the sheen goes well with fabrics.
-
Sand the surface after polyurethane dries completely. Use #600 after the first and second coat, and use $2400 after the third coat to give a nice polished look.
In the workshop the participants did only one coat of polyurethane, due to the time constraints. But if you try at home, I strongly recommend to coat 3 times.


